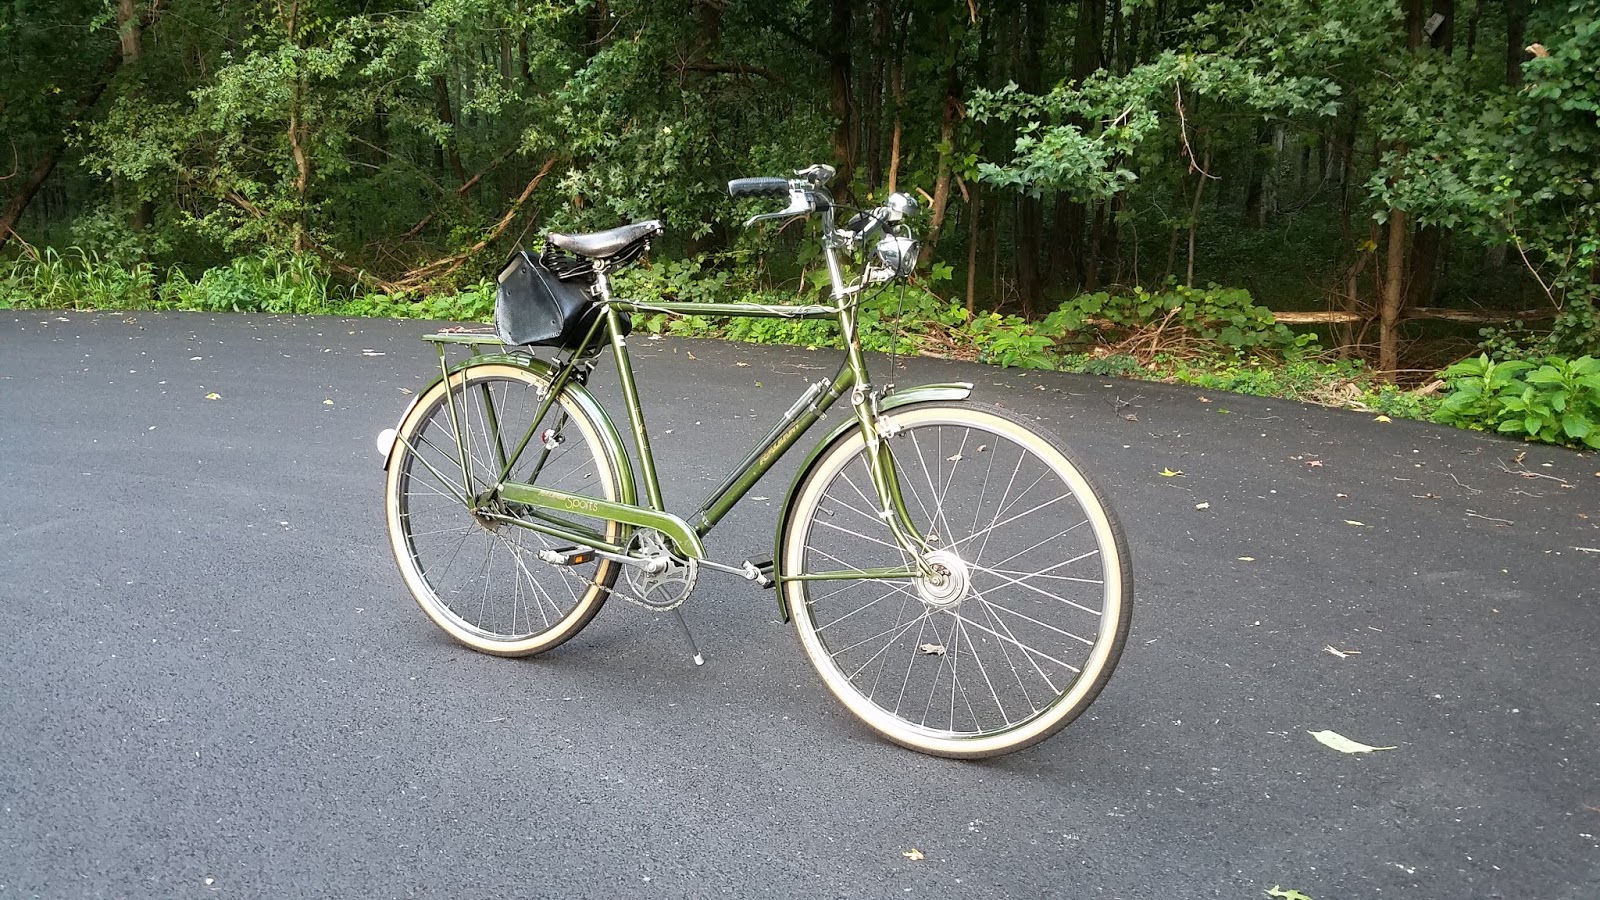
Phillips Rod Brake Roadster
Back in June, I bought a faded, very old Phillips bicycle. This is a Phillips bicycle. The bike was more or less complete, and still had its original paint, but was well-worn and faded.
This is the bicycle basically as it arrived. Needs quite a bit of work!
So basically, the bike is there, but needed a lot of work. The wheel condition in particular was typical for a very old, very well-used English roadster. The rims were solid, but totally rusted and not very straight any more. The spokes were pitted and many were just plain shot. The nipples were a bear to adjust at all.
I've been working very slowly since June - just a couple of days per month on the bike. This weekend was the first weekend where I spent substantial time on the bike, other than just disassembly (which itself was time-consuming because of how gunked and/or rusted things were).
September 2018 Project Update
At this point, the bicycle is disassembled. I'm down to just the frame/fork/stays combo on the stand. I bag/box up the parts and keep parts together so I remember where they go. This bike in particular has some quirky elements that are very different from the more common, post-war Raleigh DL-1 roadster. So it's a good idea to keep the parts together and label what you have.
Cleaning old, black British paint
(You'll need: Scratch-X or Scratch Doctor or similarly good paint-friendly polish; soft, clean rags)
This very old bicycle appears to have the typically British, black paint. Whatever its composition, this paint is not as hard as post-war Raleigh black paint, and when you polish the paint, it leaves a brown-ish color on the polish rag rather than pure black. However, this paint is still fairly durable and does a fine job protecting the base metal.
I used Scratch-X car polish on the bike, and the paint shined up nicely. It does not clean up quite as nicely as 1950s-era Raleigh black, but it's still pretty good.
There's even some spots where the original pinstripes are still present, which is pretty good for an 85 year old bicycle.
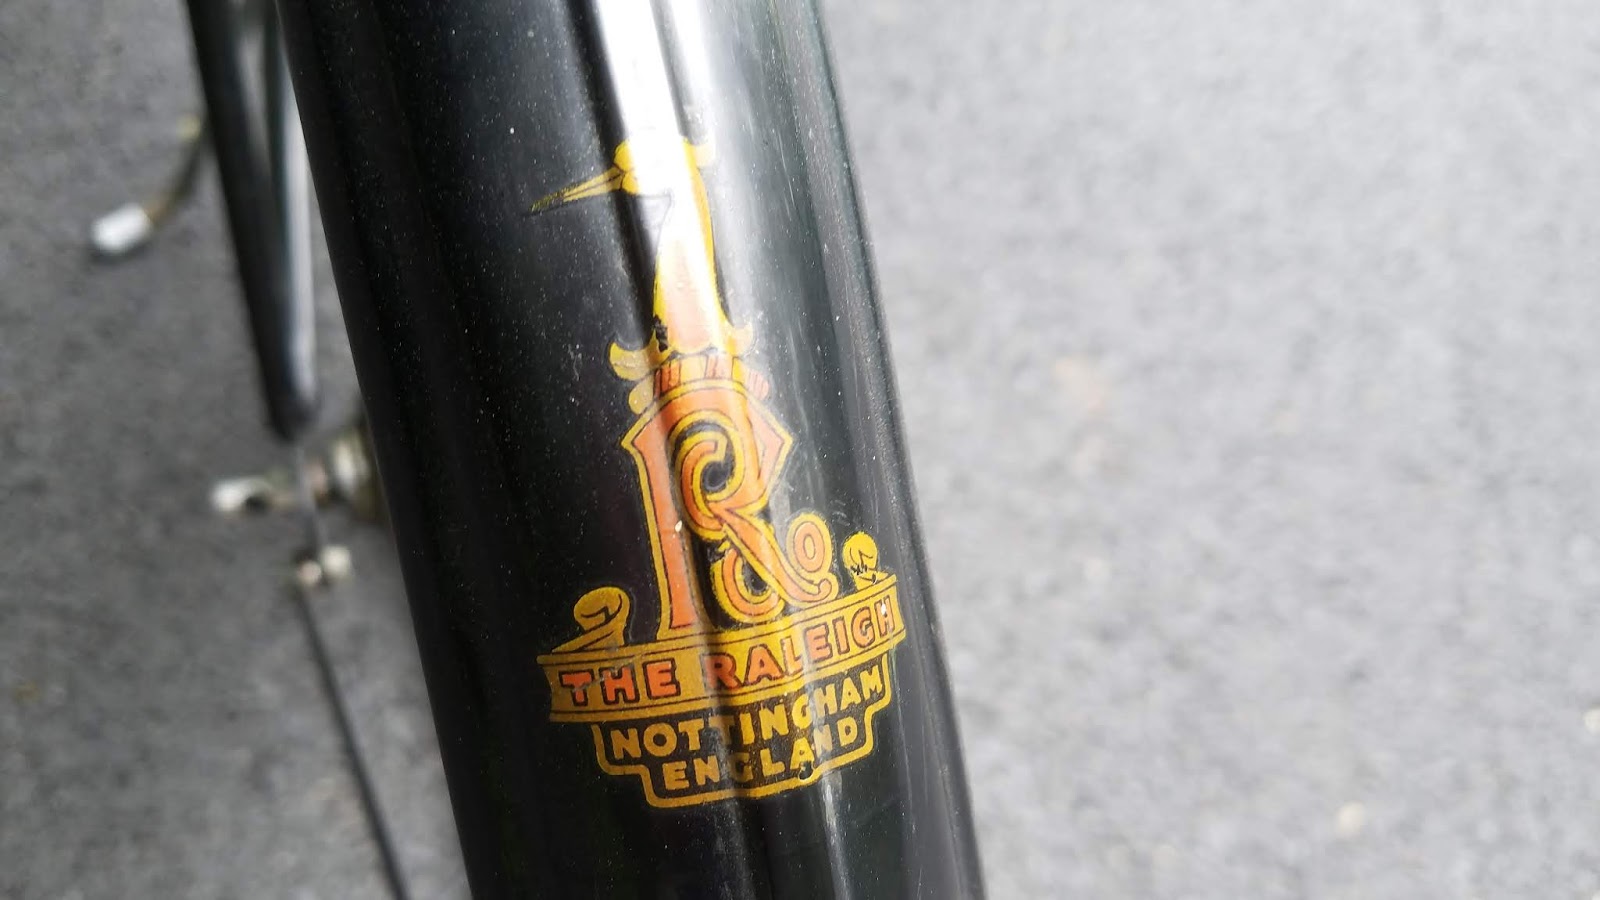
The frame still has some decent Phillips transfers. This bicycle does not have a badge, it instead has an ornate Phillips (lion) transfer on the head tube. The lugs are of a straight-cut, very heavy-duty style.
The seat tube "Phillips" transfer is pain, and in extraordinary shape for its age. I wish the lion was in as nice a condition, but this is still pretty good overall.
There are still some areas that are not totally shined-up. These are areas where there are delicate transfers or remnants of pinstripes. Since I want to preserve these things, I do not polish over them. I avoid them by carefully polishing by hand. It is time-consuming, but worth the preservation.
Frame Brazing Repair
One problem with the frame when the bike arrived was that there as a split in the rear fork joint. The way the rear forks are constructed, a solid piece of metal is sandwiched inside a cut in the chainstay tube end. The sandwich was then brazed with a softer alloy, locking the solid "drop out metal" in place inside the chainstay. The non-drive side joint had opened up.
I took the frame over to Urban East, a motorcycle fabrication shop in Lorton, VA. They brazed-up the frame joint with an alloy, which is consistent with the original construction methods on this bike. I was very happy they recognized this was a job for brazing. The work was excellent, and the brazing work only minimally disturbed the nearby paint. I should be able to touch this up pretty easily.
Wheel Building
(You'll need: new Westwood rims [28 x 1 1/2]; 72 new spokes [306mm in this case]; spoke head brass washers [Velofuze here]; nipple rim washers [Zipp Firecrest Westwood type here]; spoke wrench; and a little light oil).
The original Phillips rims are built like a tank - heavy and solid despite 85 years of rust. The original plating is badly worn and they are not very straight any more. So we have to build wheels... The original rear hub is nickel plated and a single speed, but the integral cups are shot. Someone was riding this bike with contaminated bearings at some point and tore big pits into the cups.
I've ordered a new set of Westwood KW Products rims from Yellow Jersey in Wisconsin. I've used a number of different "new" rims over the years for rod brake bikes, almost all from India. Certainly the original rims are better-made, but they stopped making those in Britain decades ago.
These KW rims are actually not bad at all. They are heavier-built than the Avro rims I got from Britain a few years ago for another bike, and the plating is a bit nicer than the Eastman rims I bought for a post-war DL-1 probably 12 years ago. These KWs should work OK.
With Westwood rims, you always want to use a nipple-rim washer. The washer is sort of shaped like a taco shell - an oval that has a bend in it to match the contour of the Westwood rim's center ridge. I use Zipp Firecrest washers, and these are just as good as the originals (they may actually be even a little heavier-duty than the originals).
At the hub flange, you also want to use a brass spoke head washer (I'm using Velofuze here). The issue is that modern spokes tend to have longer elbows than the hub flange. The flange holes also have some wear on them, from being used in the past. The brass spoke washers will improve your spoke-to-flange fit.
To build wheels, I recommend Sheldon Brown's wheelbuilding instructions.
What Hubs Am I Using?
The original front Phillips hub is a 32-hole hub plated in nickel. It has a larger barrel than the post-war Raleigh type hubs. Thankfully, the hub is in great mechanical condition, with good integral cups. I bought a fresh set of Phillips cones (eBay) and added new bearing balls (Amazon). The grease I'm using is Lucas Green Synthetic grease from a small grease gun (Lowe's/Home Depot).
The rear hub is an original Sturmey Archer AW hub from the late 1930s or early 1940s. This is a no-date hub with a small Sturmey brand strike and simply "Patent" at the bottom. This is a relatively early AW, judging from the internal parts. When I rebuilt the Sturmey hub, I went to new bearings, a longer axle, and a 1950s-era Sturmey driver that will accept a variety of cog sizes. For me, customizing the cog-to-sprocket ratio is "a must", especially on a heavier roadster like this one.
What's Next?
At this point, I need to clean up the fenders with polish. Once I've polished everything, that will establish a baseline for what kind of touch-up paint I will need (gloss vs semi-gloss vs flat black). I will then de-rust the touch up areas and match those areas to the original paint. The result will be a pretty clean finish overall. Original paint will be left alone wherever possible, and touch-up will be the least intrusive that I can make it.
I also need to re-build the headset. It will need new grease and probably new bearing balls. We'll see what condition we have in there once I open it up in a few days.