Tuesday, December 27, 2022

Winding Down 2022, Into 2023

It's surprising how quickly time moved this year. The riding season here ended a few weeks ago and now we are into the winter. For the time being there is no riding here, just indoor repairs and cleaning on some of the bikes. So I may as well leave a few year-end remarks.


Old Bike Market

I think 2022 was generally a "buyer's market" kind of year, assuming one had the spare money to actually buy anything. Inflation and a somewhat weak economy in the US and UK pushed some sellers to sell bikes for less real value that might have otherwise been had for the items. Parts from the UK were among the cheapest ever because, even as weak as the dollar was, the pound was even weaker.  If you had the money (and certainly not everyone did), there were some good bargains if you looked for them. 

This year also confirmed that despite all the talk in 2020 and 21 about COVID leading to a boom in outdoor activities like bicycling, hiking, etc., there was no lasting "boom" for vintage bikes. Whatever bump prices had in 2020 certainly was erased by inflation and a weaker market in 2022. 

The outlook for 2023 is also iffy. Inflation is still relatively high and the economy is relatively weak. There are quite a few experts predicting a recession in 2023. Such a combination of factors might allow for those who do have the money to make some relatively good deals in 2023. But don't buy vintage bikes in 2023 expecting it to be your retirement fund...


Safety and Riding

I do not think that road safety has substantially improved since 2020. Perhaps it has degraded a bit, but certainly not improved. Much has been said about COVID causing increased car traffic, faster drivers, more aggressive driving, etc. The number of pedestrian and bicyclist injuries and deaths in my state have remained stubbornly high, despite us now being over two years since COVID. Ride carefully and use an LED safety light when in doubt.

Interactions between bicyclists and cars here also are not much better. This year, at one point, a lunatic driving a beat up sedan yelled at me about using the road, and how bicyclists were causing the roads to close. I don't know what he was talking about, but he slowed down and yelled at me about some political business about road closures due to bicycles. None of it made sense. I also observed a bicyclist who "took the lane" and was tailgated, given the horn, and berated by a car full of college-aged students. They were pissed off that he was in the lane and they turned into real jerks.

Unfortunately, I do not foresee an immediate improvement for 2023. Traffic will probably remain relatively heavy, drivers will still be driving large SUVs, vans, trucks, and the like, and infrastructure is improved only slowly. If bike trails are expanding in your area, it's always a good time to try them to get away from the cars and trucks.


My Plans

I will be back at it as usual in 2023. I have a couple bikes to sell so my garage will not be so cluttered, and who knows if I get sucked into buying bikes because I happen to see something I think I have to own. But for now, the plan is to slightly downsize once I figure out which bikes are not being ridden enough to justify keeping them.

I am hopeful that the riding season will begin in March, which usually means we have a somewhat longer season than usual. But there's always the chance we get late snow and don't start until later in April. We shall see... 


Thursday, November 10, 2022

Pedals - Infesto/German Pedal Rebuild

 I've talked in the past about rebuilding Union pedals, MKS 3000 pedals, Raleigh pedals, and Torrington pedals. Each is similar, but has a few differences. 

This entry is to show how to rebuild an alternate style of German pedal, which is different from the more common Union. Several German brands, and perhaps some lesser-seen vintage Japanese brands, rebuild in this manner.

1. Use a thin, flat-bladed screw driver and a small hammer to wedge-off the dust cap. The dust caps on English pedals tend to be threaded, but on these German pedals and the Union bow models, the dust cap is a slip fit.

2. Remove the nuts securing the cage together. These are the little nuts at the end of the axles holding the rubber pedal blocks.

3. Now the pedal can be taken apart down to the core. Pull the cages apart and remove the inner base plate from the pedal core.


4. Place the flat of the pedal axle in a vise. Unscrew the lock nut and lock spacer. 


5. Unscrew the bearing cone nut carefully, so as not to allow the bearing balls (loose) to roll over everywhere. Keep a close eye on the inner bearings as well - once the cone nut is loose, it is possible to pull the bearing joints so that the balls escape and roll out everywhere. A magnetic catch bowl can be placed below the work if you are afraid of bearing balls escaping.

6. Carefully disassemble the pedal core, and clean and inspect all parts.


These pedals, when disassembled allow each bearing cup to be removed from the axle cover tube. NOTE: ONE CUP HAS A LARGER CENTER HOLE. That cup with the larger center hole is the one that mounts on the INSIDE, so that it runs its bearings against the base of the pedal spindle. 


Reassembly is just the reverse: re-grease everything, re-assemble the cores (see note above about the differing cups), mount the cages and secure the cage nuts, and final adjust the bearing tension, then put the dust cap back on by gently tapping with a rubber mallet.


Other notes:

-Bearing tension is standard - loose enough to turn freely, but not so loose that side-to-side play develops appreciably. Just a hint of play is OK.

-Again, note that the cups are not the same. The larger hole is the inside cup, the that works in conjunction with the spindle base/fixed cone. Do not try to force the small hole cup to slide all the way down the spindle.

-Some dust caps may be stubborn. Don't be afraid to line the dust cap with a little grease when reassembling, or to use a little WD-40 or Kroil when taking apart.

-Do not remove the rubber blocks from their axles if they appear to be solidly in place. There is no need to remove the rubber blocks from their axles unless you absolutely must repair something there.


Sunday, November 6, 2022

Schwinn Cones - Surfacing and Smoothing

I wrote recently about my process for resurfacing and smoothing Sturmey Archer cones and Raleigh front cones. [See HERE]

The set up and work are fairly basic - take a spare or damaged axle appropriate for the cone you want to surface and smooth. Cut the axle in half so that the smooth center portion will go into the drill press chuck. 

Gather your materials - pencil stones, emery pieces, polishing tips, polish, rags, and oil. The surface is worked evenly from coarse to smooth. Some cones may not need help from the stones, and others will need more substantial work. Some cones can be saved; some cannot. But keep working the surface as evenly as you can. 

After final polish, de-grease with acetone and then apply some gun bluing and finally oil for storage. 

Schwinn cones seem a little softer generally than Sturmey or Raleigh cones. It's not a big difference, but the stones seem to work the surface a little faster than the British cones. All of the cones were reasonably well-made and seem to re-smooth pretty well. 

They may not end up lasting as long as new-old stock cones, but at least they can run awhile longer and are saved from the scrapper.


Saturday, November 5, 2022

End of Season Rides - 1968 Raleigh Sports Three Speed

Back during the summer, a neighbor very kindly gave me a vintage Raleigh Sports that he had owned since new in 1968. Over the course of the summer and fall, I disassembled, cleaned, and returned the bike to riding shape. 


The results are pretty good - a well-made Raleigh Sports returned to the road, just in time for the last couple rides of the season. The clocks roll back one hour this weekend, and the daylight is getting shorter each day. But I was able to get this bike onto the road for the end of the season.


Over the course of this fall and winter, I plan to do a retro LED light set up on the bike, as I have done on many others in the past. I'll be using a Kiley LED retro headlight, and an an LED tail light that looks like it belongs on this bike. For now, it has temporary lights to finish this season.

It's nice returning old bikes to the road, and it's especially nice getting a bike that someone has held onto for many years, and then bringing it back to riding condition. 


Sunday, October 30, 2022

Sturmey Archer Hub Haul - More Stuff to Work on this Winter

 Here's a recent parts haul: three Sturmey Archer AW three speed hub. One is an early AW with small imprint and 40 hole shell (for an English bike); the second is a 1950 40 hole hub (for an English bike); and the third is a 1956 36 hole hub (for an American/Schwinn bike).

The early hub has the old-style plating and hardware, whereas the post-war hubs have the nicer chrome and the more familiar hardware. The early AW and the 1950 have the threaded type drivers and sprockets.

All three hubs should be decent projects for cleaning and repair this winter. 


Saturday, October 22, 2022

Resurfacing Vintage Hub Cones

 If you have been restoring old bikes for a long enough time, you've undoubtedly run into at least one or two cases of pitted cones. [The basics of cup and cone hubs can be found HERE.]

Often, the cone and bearing balls will become worn or pitted first, followed eventually by the cup inside the hub shell. This presents an opportunity - if you can clean, repair, and re-pack the hub before the cup inside the hub shell goes bad, you usually can save the hub the scrap heap. 

So you need good bearing balls and good cones. Good bearing balls for the common Schwinn, Raleigh, Sturmey, etc. hubs are available on eBay, Amazon, etc. I buy mine in bags of 500. 

That leaves us with the cone - what to do with a pitted cone. If the pits are very minimal, you may be able to ignore them for now, or you may get by with a simple, gentle hand polishing with some Simichrome polish and a soft cloth.

But what if the cone needs more resurfacing? Sometimes this is easily done because the replacement parts are common, but sometimes you want to try to save the old part.

Over the past couple of days, I've set up my desktop drill press so that I can resurface old cones. The results have been very good - cones with minor and moderate pitting can be smoothed out using the drill press.

Here is the set up:

I have an scrap Sturmey Archer front axle in the chuck of the drill press, and the cone needing work threaded onto the axle. (Note - use an axle that is scrap, don't use a good one in the chuck). 

On the work platform are my supplies - a bottle of light oil, a pencil stone (as one can get for a Dremel tool), coarse sand emery, fine emery, a felt polishing tip, and Simichrome polish.

So let's begin...

With the axle in the chuck, and the cone threaded tightly onto the axle, we can now turn on the drill press and it will turn the axle and cone. This particular cone has moderate pitting, as show below. Let's give this a try because, frankly, the alternative is to throw it away anyway, so why not try to save it?

With the drill press turning our set up, we can put some oil on the stone and gently begin smoothing the bearing surface. I work in gentle, up and down strokes to cover the surface evenly and to preserve the general shape of the cone while removing material. You want to remove material gradually and evenly. Don't press too hard, and refresh the oil every so often. Stop to check your work frequently.


Once the worst of the pitting is gone (it's a judgment call), you can move to the coarse emery. Again, oil the emery a bit and gently smooth, using up and down strokes to evenly cover the surface. Don't push too hard. Let the emery and oil do the work of smoothing.

After awhile, you should have a relatively smooth surface. You've removed enough material to get rid of all but the smallest pits (they're tiny specs now). You may need several cycles of stone and coarse emery to get where you want to be for final smoothing. When you reach that point, it's time for the fine emery with a little oil on it. Your end of the work is the same: gentle pressure, and up and down strokes to evenly work the surface.

Below is the surface after the coarse emery and before the fine. You can see it's already much smoother, but there is still a little more to go...


And below is the surface after the fine emery. Getting there...


Having gone through the stone, coarse emery, and fine emery, we're now ready for a final polishing. This will give us the smooth, mirror-like finish we want for running the hub with the bearing balls. I take a little felt polishing tip (again, the kind you might buy for a Dremel tool), and load up the tip with some Simichrome polish. This is a high-quality metal polish that I like for cleaning up plated or smooth metal surfaces.

No to sound like a broken record, but your process is the same: gentle pressure and up-and-down strokes with the polishing tip to work the surface evenly. Below is the result.

Not bad at all... it's looking much better.

At this point you have a couple of choices. You can leave the surface "in the white", which is fine if you are going to immediately build this cone into a hub and start riding. The grease and use of the hub will prevent corrosion.

But if the cone is going into the parts drawer for later use, why not add a little rust prevention? At this point, I take a rag with some acetone on it, and de-grease the surface of the cone. With the surface clean, I apply a little cold bluing solution (Birchwood Casey brand, in this case). The bluing will bring the surface to match the rest of the cone, and we end up with a part that looks an awful lot like a new old stock cone. It might not be perfect... but it's a lot better and we've saved this cone from the scrap heap.


And the cone can then be rebuilt into a hub using the normal re-packing method.


One question you may have is whether we can do this with a Sturmey Archer AW cone. We often come across AW hubs that have pitted cones, but are otherwise in good shape. The answer is, "yes", you can absolutely resurface a Sturmey Archer AW cone with mild or moderate pitting. You'll need a donor Sturmey Axle half to put in the chuck, and then your work is basically the same as I have outlined above.

The result is pretty good:

So the bottom line is, yes, you can absolutely save your old front and rear hub cones if you have a home drill press, a few basic materials, and the patience to check your work as you go. Let's save as many of these old parts as we can.


Friday, October 21, 2022

1942 Schwinn New World / B.F. Goodrich New World and Fall Colors


Swapped this 1942 Schwinn / B.F. Goodrich New World over to a set of pre-war touring bars. I got these from a seller online, and they go nicely with this bike. They're just a size or so bigger than the post-war New World type bars. They're pretty comfortable. The Gyes saddle still needs breaking in. It's definitely harder leather than a Brooks, but perhaps with some time and effort, it will improve. 


Wednesday, October 12, 2022

Fall Colors

 Fall is certainly here now - cooler weather, shorter days, and lots of colorful leaves. It seems to me the foliage is actually a little behind where it usually is this time of year. We haven't yet had a hard frost that would really bring out the colors and falling leaves all at one time. We've had a few warm, sunny days here lately, which means a final chance to do some riding before the cold weather and really short days come. I'm riding this 1958 Raleigh Sports four speed - a long time favorite of mine - this week. 


Friday, October 7, 2022

What Was the "Golden Age" of English Three Speeds, Anyway?

One of the subjects sometimes discussed by enthusiasts of vintage bicycles, and particularly three speed bikes, is exactly when the "golden age" of the English three speed took place in the United States. Collectors of such bicycles in the U.S. today seem to focus on the period from 1946 through 1959 as the "golden age". This short article argues that the "golden age" of the English three speed in the United States in broader memory took place between 1960 and the road bike boom of the early '70s, contrary to the viewpoint of most collectors today.

First, let's address the geography. In Britain, we can trace the popular three speed bike back to the early days of internal gears around 1900. In contrast, in the United States, relatively few three speeds were imported prior to the 1930s. A British enthusiast might think of the "golden age" as being antique three speed bikes from before WWII, whereas even a 1950s bike would be an antique in the United States.

Most collectors of three speed bikes in the United States regard the apex of quality as taking place some time between 1935 and 1960. Opinions differ, but generally the period 1946 through 1959 is cited most frequently as the "golden age", based on quality and the variety of English three speed bikes offered in the U.S. I tend to agree with that assessment, if we're looking at just quality-of-product.

I'd like to offer another perspective, one that could be called the "popular viewpoint". In other words, how the general public remembers the English three speed in the U.S. rather than the relatively niche group of collectors who have these bikes today. This broader view holds that the "golden age" of the English three speed in the United States took place between 1960 and the 10-speed boom of the early '70s.

During the 1950s, "balloon tire" single speed long-popular in the U.S. went into a steep decline. That style of bike was gradually replaced by "middleweight" bicycles, some of which had hand brakes and three speed hubs, introducing many riders to elements of English three speed bikes. Eventually, these bicycles were supplanted by the small wheel "muscle bikes" and the English three speed bikes in the early and mid 1960s. For many people in high school, college/university, and graduate school settings in the 1960s and early 1970s, the English three speed bike was the go-to vehicle. 

The people I've spoken to over the years point to the period between 1960 and the 10-speed "bike boom" of the early 1970s as being the popular "golden age" of the three speed in the U.S. These riders, generally born between 1940 and 1960, relied heavily on English three speeds to get to school, commute to class, pick up groceries, deliver newspapers, etc. It is also interesting that this period do not coincide with what collectors today think of as the "golden age" of English bikes in the U.S. In fact, collectors sometimes deride the bikes made after the early 1960s as increasingly more cheaply made than earlier bikes. 

The quantity of English three speeds imported into the U.S. is much closer to the popular memory than with the collectors and experts today. The vast majority of English three speeds imported into the U.S. came into the country from 1960 through 1975. There was strong demand for these bikes after the decline of the balloon tire bikes, but before the 10-speed road bike boom of the early '70s. 

The anecdotes I have heard (samples below) over the years are consistent with popular memory as well:


"In the 1960s, no one wanted fat tire bikes anymore. Those were heavy and not cool. Everyone wanted either a Sting Ray or an English three speed."

"I replaced my Sears bike (a middleweight) with an English bike (a three speed Dunelt)."

"In the 1960s, it was de rigeur to have a three speed."

"I bought a Raleigh three speed with my allowance (this was in the early 1960s), put on a basket and delivered newspapers with that bike."

 "I remember three of the kids on my block had three speeds in the 1960s."

[Several people I have spoken to over the years recall getting British three speed bikes as presents from family members in the 1960s. Their stories are all similar]


Given that three speed bike use in the U.S. appears to have been strongest from 1960 through the road bike boom of the early 70s, there is a certain collector snobbishness at work. In the popular mind, and especially among the large "baby boom" generation, the English three speed in the U.S. will be remembered as an icon of the years between 1960 and the early 70s, alongside the Beatles, the Beach Boys, Bob Dylan, James Bond, and the Rolling Stones. Popular memory overall and what a narrow set of collectors have in mind often aren't the same thing.


Thursday, September 29, 2022

Fall Rides - 1967 Raleigh Sprite

 Here are a few more shots of the 1967 Raleigh Sprite on the road. I have substituted the Wald kickstand for the "ESGE" model specifically made for Raleigh Sports/Sprite frames. It was new-old-stock and still in its original packaging. I figured this bike is nice enough to have earned a new-old-stock stand. 

The days are getting shorter! Make sure your lights work and you bring your cellphone with you when you ride. The weather here is cool and very friendly to riding. It's looking like just a few weeks left of the riding season... 


Tuesday, September 27, 2022

Copake Bicycle and Transportation Auction - October 15, 2022

 I occasionally peruse the Copake Auction catalog when their spring or fall bicycle auction takes place. Copake is about 60 minutes west of my home, so if there was something I absolutely had to own, I probably would go and bid on it. 

The next auction is October 15, 2022. The catalog is available HERE 

This year's auction is strong on pre-1933 "antique" or "wood wheel" era bikes - Iver Johnson, Columbia/Westfield, Crescent, etc. There are several very old, shaft-drive (chainless) bicycles.

However, it is pretty thin on roadster/utility/three speed content. I am not surprised as most of the basic three speed models don't bring in the money to justify the auction. 

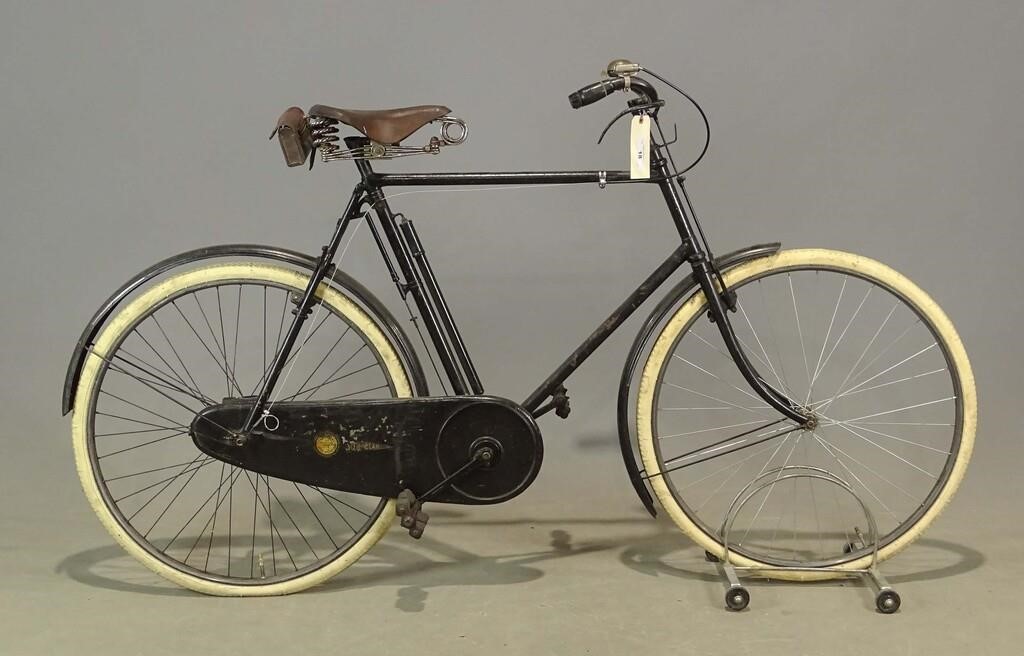
My pick of this auction is lot #18 - Sunbeam bicycle


This looks to be an old school Sunbeam with that brand's somewhat unique brake system and the oil bath chain case. A true "oil bath" chaincase is a fully-enclosed chain guard with a pocket of oil on the bottom. The chain passes through the oil pocket once per revolution through the system. Not all fully-enclosed chain guards are "oil bath" chain guards, though some people call any fully enclosed chain guard an oil bath. That is technically incorrect - a fully enclosed chain guard is a "chain case" or "gear case", and not all of them have the oil bath pocket in them. 

Sunbeam advertised the "little oil bath", apparently a compact-ish version of the oil bath concept.

This bicycle is for a taller rider, but for being in the US, it's a nice example of a classic British bicycle.


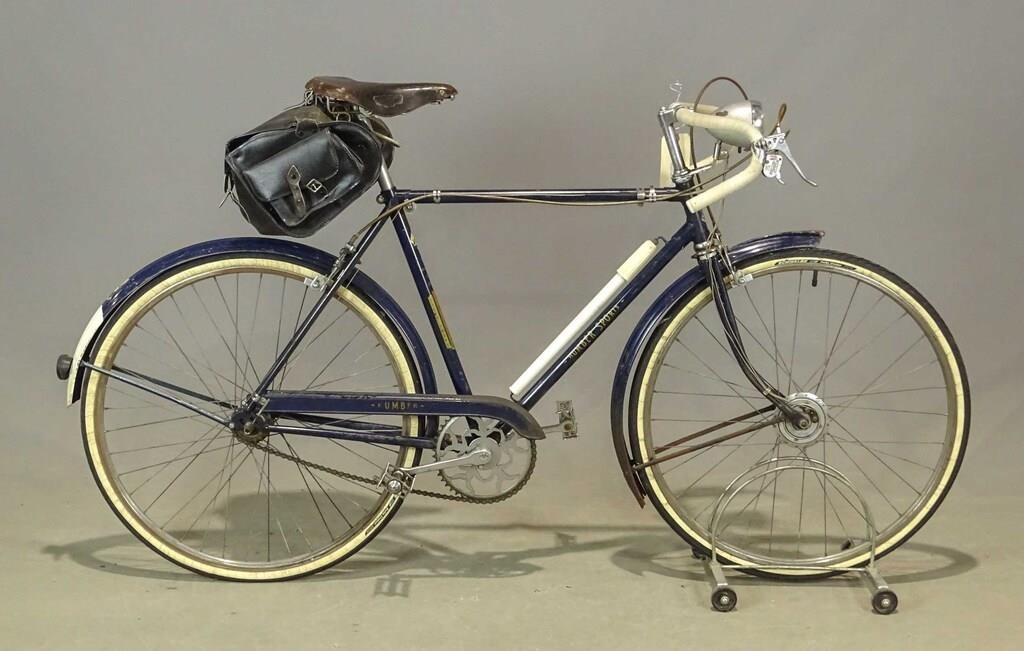
For a more mundane (and smaller) bicycle, Lot 30 - Humber Sports Lightweight, looks interesting. It looks to be a drop bar conversion of a standard three speed "Sports" type bike. But it is a tastefully done variation.


 I will not be bidding on any lots in the auction, but good luck to those who are bidding.


Wednesday, September 21, 2022

1942 B.F. Goodrich / Schwinn New World


Here is  the 1942 B.F. Goodrich badged Schwinn New World, in more or less completed form. I've done a couple short test rides and set up the saddle and bars to a position that is fairly comfortable for me. 


It's hard to believe this bike began as just a core: frame, fork, and fenders. I've sourced many 1940s-era Schwinn parts and other parts appropriate for this bike. The wheel set is my own build: vintage Sturmey Archer AW rear hub, with Schwinn hourglass front hub. Rims are Schwinn S6. 


Given the year of this bike, I decided to go with a 1940s/WWII type aviation theme, as shown in the large, wing-shaped chain guard from the years just before that war. This matches nicely with a WWII style USAAF type pin on the saddle bag.  The tear drop emblems on the grips also go nicely with the wing/aviation theme, even if they are reproductions.


This many not be the absolutely final set up (I still have to test the saddle position out on longer rides, and we'll see how the very old Torrington pedals hold up with their new rubber blocks). But so far, so good. I think it looks pretty good, and I am loving that chain guard.


Specs:

Frame and fork: 1942 Schwinn New World, just under 22 inches. Basic steel with hybrid construction - some joints are electroforge welded and some are fillet brazed, original 1942 Schwinn torpedo blade style fork. 

Fenders: steel, Schwinn New World with correct wire braces in black paint.

Cranks: Schwinn dogleg one-piece, 4-hole clover sprocket.

Hubs: Sturmey AW 3-speed rear, Schwinn hourglass front. Sturmey Archer quadrant shifter. 

Saddle: Gyes three-spring roadster type.

Handlebars: Schwinn North Road style 

Wheels: Schwinn S6 rims, Sapim stainless double-butted spokes. 

Brakes/levers: Schwinn-built steel calipers and levers.

Lights: Kiley LED retro front, Soma Silver Bullet LED rear light.

Grips: Schwinn teardrop reproduction.


Saturday, September 17, 2022

1942 Schwinn New World - More Progress

 Here's the latest progress shot of the 1942 Schwinn New World three speed project. After fooling with the fitting a bit, I got a beautiful, wing-shaped chain guard to fit. The wing has several mounting holes, to enable the guard to go on several kinds of bikes. The brakes are set up now, as is the headlight and grips. The bag is the Banjo Brothers small barrel type. The tail light and pedals still need to be added, but it's coming along nicely.


Monday, September 12, 2022

Reviving 1940s Schwinn Bottom Bracket Parts

Here's a nice little trove of pre-war and immediate post-war Schwinn parts: dog leg cranks (one worn, the other very clean), bottom bracket parts, four-hole pre-war Schwinn chain ring, and cottered "AS&Co" Schwinn cranks. 

A few notes:

  • The four hole clover chain ring is what you want for the pre-war Schwinn New World bikes with one-piece cranks. This chain ring looks a lot like the common, post-war types, but has three extra peg holes. The 46-tooth chain ring pairs nicely with a 22-tooth cog and three speed hub.


  • The dogleg cranks are appropriate for pre-war and wartime New World bikes. The correct crank is the number "502". This is a crank that was used on women's balloon tire cruisers, and on the Schwinn lightweights (both men's and women's lightweights). The "501" is for the men's balloon tire bikes and is slightly longer than the 502. The 502 is what you want for the New World bikes (men's and women's both use the 502).


  • The three-piece "AS&Co" cranks are correct for pre-war and immediate post-war bikes. A 1940-41 New World will use them, as will the late 1940s and early 1950s Superiors. Schwinn produced these cranks, but the design appears to be inspired by a 1930s BSA or Hercules design (BSA actually made a similar chainring using its own initials). 


  • The quality of the chrome plating from before WWII is decent, but I think the plating from right after the war (1940s-50s) was a bit better. All the parts are pretty durable and well-made from a functional standpoint. 


  • Clean-up is done using Evaporust or Oxalic Acid, followed by a rinse and light wire brushing. For heavier work, such as on the crank in the middle, a wire brush wheel on a bench grinding machine cleans up heavier rust. Wear a mask if using a mechanized brush!

Thursday, September 8, 2022

New Look, On-Going Project...

So after 10 full years (Bike Shed had its 10th anniversary in August 2022) of using a simple, grey and black theme, Blogger has decided it is dumping compatibility with that old design. The text was no longer displaying properly, at least on some computers, and customization of the layout was pretty limited by today's standards.

So it was time for a new look. I have decided that blue and grey look pretty good, and are easy enough on the eyes... So blue and grey it will be for now.

Now, for a more interesting subject... I am making slow but steady progress on re-building a 1942, World War II era Schwinn New World. Schwinn built this bicycle for B.F. Goodrich, to be sold in that company's tire shops. I received this as a bike "core" - frame, fenders, and a few other parts. 


Added to this bike are a 1950s-era US-made stem (Wald, I suppose), and a set of Schwinn "North Road" style handlebars. Those are Schwinn's interpretation of the popular, British North Road bars used by Raleigh on its Sports and other light roadster bikes.

Also added to the mix are a set of 1940s "Schwinn Built" brake calipers, and 1940s Schwinn brake levers.

The bottom bracket set is from a 1941 Schwinn New World: dogleg crank, 4-hole chainring, and the hardware to go with that. Also from a 1941 New World are the wire braces for the fenders.

The wheelset is a 1950s era Sturmey Archer rear hub and a 1950s type Schwinn hourglass front hub. The rims are "new old stock" Schwinn S6 steel/chrome rims. The spokes are Sapim double-butted stainless. 


The project is not yet done, but I chalk this up to another New World that started as a bike core and a few parts, and which will now become a fully capable bicycle once again. I have more to do, but so far so good...


Tuesday, August 30, 2022

Wednesday, August 24, 2022

Late Summer Evenings...

Tonight was a warm, humid summer evening. The days are starting to get a bit shorter... I took this nice, old 1950 Schwinn Superior for a ride down the road to a grassy park and lake in the next town.


Thursday, August 18, 2022

Wartime Schwinn New World Frame - No Frills

 My current project is a WWII era Schwinn New World. This frame shows that at Schwinn, as with so many other factories in the United States at the start of 1942, war production was commencing. This New World frame is a mixture of electroforge welded and fillet brazed. 

Above: the seat tube joint is welded but the chain stays and downtube are fillet brazed.

 The welded joints are fairly clean, though there is some bumpiness around the welds in a few areas. The electroforge process was highly automated, but also relied on a degree of hand cutting and finishing the excess metal around the weld. The hand finishing, even in peacetime, was less than that of a premium fillet brazed joint. But some of these wartime joints are a little bumpy.


Above: a headset cup painted black rather than plated.


The fillet brazed joints are one area where you really see that Schwinn was trying to churn out the last few bikes, and move into war production. The fillet brazed joints are adequate, but show very little or no hand finishing. The integrated seat clamp is roughly finishing and bumpy.

Above: the seat stay joint is brazed but not smoothly finished, seat clamp is somewhat rough.
 

A disproportionate number of these wartime frames are badged for sale at B.F. Goodrich stores. This is one of several 1941-42 bikes that had Goodrich badges and were made by Schwinn. It is possible that Schwinn was rounding out a contract to produce bikes for Goodrich before wartime production commenced in full. Schwinn was not one of the bicycle manufacturers permitted to produce bikes throughout the war (as for example, Westfield/Columbia was permitted).

Above: braze joints are solid, but a bit roughly finished.


The reduced level of final finishing does not weaken this frame any, and it remains a good, sturdy frame. However, the sort of attention to detail and hand finishing one would expect of a Schwinn produced in, say 1940 or 1946-47 is not there. It's an interesting artifact of a unique and stressful era of U.S. history.


Sunday, August 14, 2022

Why You Don't Re-Use British-Style Cloth Rim Strips...

British-made three speed bikes often come with old, cloth rim strips. These are identifiable by their white/cotton color, and metal buckle holding them together. 

I love old Dunlop tubes and old Dunlop tires - they were really well made parts. Most of the time the old tires are all dried... but sometimes you get lucky and find good, old tires.

One thing you want to dump though are the old, cloth rim strips that are found under these tubes and tires. If they take water or moisture, they will hold it against the rim, and leave a big, ugly rust spot.

The Raleigh Sprite project I recently completed had very, very clean rims. In fact, the only rust spots were inside the rims, where the cloth strips had taken water and held it against the rim. They cleaned up well enough, but don't re-use these rim strips if you value your rims.

 Below you can see the spots where there was moisture, and rust formed - indicated by the brown stains on the strip.


The rim strip above is a "moderate" case, and certainly nothing that will harm the structure of the rim. But it makes a mess and leaves a point where future moisture could cause the rust to restart. In the worst cases, the rust will actually eat through the inside of the rim, leaving you wondering how the rim could look passable outside, but be so badly rusted inside. 

Don't re-use these strips. Velox rim tape and even the basic, rubber strips, are a better choice.


Saturday, August 6, 2022

1967 Raleigh Sprite 5-Speed


 I have more or less finished with the Raleigh Sprite 5-speed refurbishment. This bike came to me in pretty good condition on basically a local sale (I drove about 25 minutes each way, but sort of local still). 


The bike was basically all original - even the tubes, cloth rim strips, and shock-stop grips were there. 

I made relatively few changes. I put on a new set of Michelin World Tour tires (white wall, going off the period Raleigh catalogs); put in new rim strips; and and lubricated all the moving parts. 


The fixed-end cables were lubricated by removing them, hanging them up vertically, and then spraying white lithium grease down the cable cores and into the housings. Gravity then carried the semi-liquid grease downward and throughout the housings/cables.


I put on new brake pads - Kool Stop John Bull replacements. I used the standard Kool Stop black pads.

New additions are the retro LED lights - a Kiley bullet front to capture the look of the old Sturmey Archer, Miller, or Lucas units; and the rear is an Aluma-Lite rechargeable USB type. These lights capture the retro 1960s look, but with modern LED brightness for safety on busy roads. I added a classic 3-inch Miller bell to the handle bars for bike trail use.

Above: Aluma-Lite retro style LED mated to Miller bracket


The original Brooks B72 saddle was not in bad shape. It was a little dry, but still pretty good. I did a couple of test rides and decided to go with a Brooks B66 saddle instead. The B66 soaks up our bumpy New England roads a little better than the 72. But that's a personal taste sort of thing.


So far I have preserved the old, plastic shifters and the somewhat anemic sheet metal bell crank for the rear hub push-rod. These sheet metal bell cranks are not terribly robust, but let's see what it can do before replacing it entirely.


The old, grey shock-stop grips were too far gone to save. They actually had split some time ago, and someone tried to superglue them back together. That sort of thing usually doesn't work, but at least someone was trying to keep them going. I substituted in a set of black Dare grips, which are similar to the originals but black, and a whole lot more robust. 

I previously wrote about making your own bronze green paint from Testors model paints. It's not overly difficult, and I did a little bit of touch up on this bike. There wasn't a great deal of that to do, but while it's apart, why not make it look better?

I love the winged 5-speed graphics on these Sprites


The final product looks nice. I'm nearing the end of what I consider to be "test" rides. I'm getting fairly reliable shifting from the old shifter and bell crank, smooth running from the hubs, and decent enough braking from the pads. I am using a 24 tooth rear cog (48 tooth sprocket up front), which gives a very low gearing for hills, though the top gear still isn't bad when you have a tail wind or downhill. 

I love it when the pinstripes are still there...


Overall, I'm fairly pleased with how it came out. I'm keeping an eye on the bell crank and shifter set up. They're known for giving problems, though these are very low mileage and in good shape. If need be, I'll upgrade the bell crank, but will see how the original holds up to some more riding first.

I'm still enjoying summer riding, and this Sprite adds to the different vintage bikes I can pick for a nice, evening ride.

Not a bad result...