Wednesday, January 30, 2013

Schwinn New World Mesinger Saddle


Earlier, I mentioned working on a saddle projects for the Schwinn New World. It turns out that the project was acquiring an original Mesinger Tourist saddle for the bike. It turns out an online shop was parting out a 1941 New World and the bike had a decent quality, original Mesinger tourist oil skin saddle. These usually turn up in abysmal shape, when they turn up at all. This is one of the most intact versions of the original saddle I've come across. Luckily it was for sale, and I acquired it for hte New World.

So it turns out I'll have not only a period saddle, but an original cataloged piece of equipment made for the New World itself.


Tuesday, January 29, 2013

Schwinn New World Warm Weather Ride

70 degrees and sunny in January? That's pretty wild, but sure enough it happened today. We were well below 30 last week, and today it was like April. Of course, that sort of weather calls for a bike ride. It was an excellent chance to further test the New World.

The saddle I'm waiting for has not arrived yet, but I still have the place holder and it rides well enough. The New World has a somewhat more forward riding position than the Raleigh Sports, but it's still fairly upright. I like to set my bars up nice and high, even if they're the flat, curved type like these.

The brake pads are breaking in nicely and the brakes stop the bike acceptably, though they do flex a bit with the wheels. The ones on my Raleigh do that as well. The handles also rattle a little as I ride. The ride itself is quite nice and these Kenda tires are not bad at all, especially considering the price. I just wish they had white walls for these bikes.

The bicycle is deceptively light and fast. It's much lighter than even my Raleigh Sports stripped down. The frame is particularly surprising in terms of its lightness and response. The fork strikes me as a little fragile, but it's not bad either. I had assumed the big skiptooth setup would be slow and too high, but it's just right for light duty riding. Overall, I am impressed with the bike overall. It really does have a unique feel.

I grabbed a few shots of the yard, the bike, and the side of the Bike Shed just before dark.


Sunday, January 27, 2013

Torrington #10 Pedals Update

The New World bicycle received the rebuilt Torrington #10 pedals. A brief test ride showed no problems with them, which is always a plus. Hopefully they'll serve well. At this point, the bicycle is down to the saddle, though I have a workable place holder for now. However, I may have some improvement happening on the saddle front pretty soon, but we'll see how it goes.


Friday, January 25, 2013

Torrington Pedals


The Schwinn New World still needs a pedal rebuild. With it cold and snowy today, I did some work refreshing them.

Torrington #8 and #10 pedals are deceptively simple. They are composed of, basically, an axle with a dog bone shaped casing over it, where the cups on each end of the bone-shaped casing contain the ball bearing cages. The axle has a fixed cone at the hilt and a screw-on cone at the end. Adjustment is made by tightening or loosening the cone nut. A lock nut and keyed spacer lock the cone nut in place.

Outside that core, there is the outer frame, which has a set of fixed pins and a pair of rubber blocks. This bolts to the inner frame which goes directly on the axle.  The picture below shows a #10 pedal taken apart for cleaning.


In this case I had to replace one pedal axle that was bent. Luckily, I had a set of worn #8s with straight axles around, so I swapped the bent axle for a straight one. It is important to remember that pedals have different threads, depending on which side of the bike they go on. These Torringtons have an "L" and an "R" on the hilt of the pedal axle. Obviously, one right and one left. Remember too, the left pedal is REVERSE threaded, so that it tightens by turning counter clockwise rather than clockwise. The right pedal is standard thread.

I lubricate the bearings with a mixture of lithium grease and medium weight oil. I like thinned grease because these really need to be able to roll freely to get a good ride. Caking on thick axle grease just gums them up. Instead, I use a mixture of thinned brown lithium grease and 50 weight motor oil.

Once they are reassembled, they don't look bad. Hopefully these will spin as nicely as I hope they will, and shall provide many more years of good service on the 1947 Schwinn New World.


Wednesday, January 23, 2013

New World Test Rides

I finally got a chance to do an earnest set of test rides on the New World today. The pedals and saddle are not in their final configuration, but I have enough here to ride. I took a couple rides about 30 minutes in length, adjusting the brakes along the way. I broke in the new brake pads too, which helped stopping power quite a bit.

The ride is unique- not quite a balloon tire and not quite a lightweight. The single speed skip tooth set up with a pretty high gear ration has the feel of a balloon tire, but it's a free wheel with less friction than a coaster brake. The calipers are pretty primitive feeling and a lot less refined than even the stock Raleigh Sports brakes from later eras. The bicycle starts a bit hard to pedal due to the high gear ratio but accelerates rather quickly. The bicycle is MUCH lighter than it looks. It weighs substantially less than my 23 inch framed Raleigh Sports. It has overall pleasant riding qualities. It turns and takes off pretty quickly. The brakes are questionable in power, but that's pretty par for a 65 year old bike. They do slow and stop the bike well enough to use, I believe.

Note: the pinch bolts on these are REALLY weak. I actually snapped one while doing an adjustment today. Luckily, I had a spare in my parts bin. If you encounter a set of these brakes make sure you GO GENTLY with the pinch bolts.

Here are a few improved shots in the sunlight. It was pretty cold today.


Tuesday, January 22, 2013

Schwinn New World Brakes, Etc

Things are really starting to come together on the Schwinn New World. After some research and questions, I found that the standard Bell cable repair kit will work for the old type Schwinn levers and "Schwinn Built" caliper brakes. That's great news because the Bell kits are cheap, plentiful, but still very effective. The black housing even matches my black New World. I will grant that it isn't 100% period correct, but it matches nicely and will provide peace of mind when I need to hit the brakes.

I chose generic caliper brake pads rather than try to refurbish the HEAVILY rusted originals. I don't like fooling with old parts in the brake system sometimes, especially when we're talking 65+ year old parts.

I then fitted the components, sized the cables and housings, and set up the brakes. My cable routing was a simple, direct type with the front brake to the left and the rear to the right. I like this lay out because it is familiar to me, and it places the important front brake in my dominant left hand. More on the subject can be read at Sheldon Brown's excellent website:

http://sheldonbrown.com/rim-brakes.html

http://sheldonbrown.com/cables.html


 The bicycle is NOT done yet, but is in a state now where I can test ride it. The only remaining parts to go over are the pedals and the saddle. I presently have an original 1940s era saddle on the bike, but it's somewhat beat up and may not last under much riding. I have the makings of another 1940s era original saddle, and I may end up re-upholstering and recovering that saddle with a nice pad and high quality black leather. For the time being, I'm content to test the bike with this relic saddle, which is period acceptable. I may ultimately opt to build my own 1940s saddle though.

The pedals on the bike now are Torrington #8 pedals, which are also period correct to the 1940s. However, they need to be re-gearsed and cleaned up. I actually have a nice set of Torrington #10 pedals I plan on using, which should be good upgrade. Those too are period correct.

I got to take a very short test ride tonight. It was bitterly cold and the wind from the moving bike did not help. That said, I began to get a flavor of the riding characteristics of the bike. It is a weird amalgam of balloon tire and lightweight characteristics. The drive train is like a hybrid of a balloon tire cruiser and a light weight (skip tooth single speed, but with a free wheel and not a coaster brake). The frame rides pretty stiff, but has relaxed frame angles, so again like a mixture of cruiser and light weight. My initial assumption is that it would handle like a slack frame English roadster, but it turns out it's apparently something weird and different entirely. It's just... unique. I only rode down the block and back, so I have more learning to do for this one.


Sunday, January 20, 2013

Schwinn New World: Reassembling The Back Side


This weekend I didn't have much free time, but I did have enough to assemble the back of the Schwinn New World on Saturday afternoon. Basically I set the tightness of the beatings on the rear wheel, then mounted the rear fender, rear wheel, and chain guard. The only twists on this assembly was the use of an extra anti-rotation spline to hold the fixed cone on the rear wheel in place (wanted to twist due to wear on the keyed washer that came with it), and a revision of the rear fender spacing between the front of the rear wheel and the fender stay on the frame.

I've noticed on these New Worlds that the rear fender often has a HUGE space between the backwheel and the front of the fender. I noticed that this is mainly because the rear wheel has to slide forward in the drops quite a bit to get it free of the bike. However, I also noticed that the massive gap over estimated the amount of forward movement in the rear wheel needed to drop it out of the frame. My solution was to use a longer screw combined with a steel tubular spacer to move the rear fender's front edge back from the chainstay. I moved it back enough to cure the huge gap but not so much that it got in the way of mounting and dismounting the rear wheel from the frame. A happy medium was the result, and it looks pretty nice when you see that very large gap is gone.


At this point, a few things remain, but not much. I still have to rebuild and mount the pedals, mount the brake cables/housings/pads, and square away the saddle situation. I do have a 1940s era men's saddle ready to go for the bike, but I'm considering rebuilding and recovering another 1940s saddle chassis I have  into a nice saddle specially built for the bike. I have yet to decide what to do, but I am entirely sure it will be a period 1940s men's saddle in use. Whether it is a tweaked and re-covered saddle or a pure original remains to be seen, and depends on the riding characteristics of each saddle.

Tuesday, January 15, 2013

Schwinn New World - Reassembling the Front End

Tonight was cold and rainy, which meant indoor work and some extra time on the New World. First, I trued, taped, tubed, and tired the rear wheel. I used the same method as the front wheel, which I detailed in an earlier post. I actually had to replace a couple spoke nipples on the rear wheel, but I luckily had some spares around.

Then I set about finishing positioning the tire on the front wheel. I deflated it down to 10 pounds, worked the tire around the bead by hand, evening it up as I went. Then I re-inflated it.

At that point it was time to reassemble the front wheel and fender onto the bike. It's pretty simple: set the bearings on the front wheel so there's just a hint of play, then put the wheel and fender onto the fork.


It went pretty well, though I noticed the front fender has a somewhat odd radius compared to the tire. It seems to be inherent in the design of the parts, since the other New World had the same thing going on when I mock assembled it last fall.


 A little adjustment and it got better, but it's still not a perfect radius compared to the tire. That said, it fits fine and the wheel and fender will work nicely.


Monday, January 14, 2013

Mounting A Tire and Reflector

Well the mail brought some goodies today: tubes for the Schwinn New World. As you'll recall, I already had the tires on hand, and I purchased some cloth rim tape last week.

First, I took the trued wheel out of the fork and put it on the table in the shed. 


Second, I got out my roll of Fond de Jante rim tape. The the original tape was a red rubber. Some people like to leave in the original tape, and I can empathize with that desire. However, I pull old rim tape for a couple of reasons. The first reason is that old rim tape often becomes brittle and prone to cracking. If the tape fails, it can allow the spoke nipple head into the tube and result in a flat. The second reason is that rust can form under the old tape. In order to get that rust out you have to pull the old tape. Given the fact that it's basically 65 year old rubber at this point, pulling the tape usually means stretching it out of shape.

I like the Fond de Jante tape. I used it on both my '74 Raleigh and my '49 Columbia. The tape is pliable and can be easily worked into the rim. The tape is also quite durable.

Start by lining up the hole in the tape with the valve hole in the rim and simply work along slowly, getting out the air bubbles and getting a tight fit to the rim. Make sure all those spoke nipple heads are covered. If you have a sharp edge anywhere up against that tube, you'll find out the hard way and it can mean some walking.


Choosing a tube for a bicycle tire:


Now that the rim tape is on, it's time to put on the tube. It's important to choose the correct tube. I buy modern rubber tubes, in this case Giant brand. Some people like to reuse old tubes, but again, it means taking a chance with 65 year old rubber and possibly your neck. This is the front wheel we're doing, so we REALLY don't want a blow out. I like the peace of mind a new tube brings.

To choose the correct tube you want to know the tire's size and the ISO bead seat size of the wheel. In this case we have a 26 x 1 3/8 nominal tire, expressed as ISO size 597. The 597 is important. You may find other tires the same nominal size or similar sizes that are totally different. The common 26 inch tube size is actually about ISO 559 or so, which is too small for a 597 wheel. In this case we want either a dead-on 597 tube or a 590 tube, which is close enough to make work.  New 597 tubes are harder to find, but many shops still have 590 tubes around. On a Schwinn S5 or S6 rim like this, your size is 597, but either will work. On a Raleigh or other English bike of 26 x 1 3/8 nominal, the size is probably 590, so you can use the 590 for a dead-on fit. I get my tubes from Harris Cyclery, which I recommend as an internet dealer.

http://sheldonbrown.com/harris/parts.html

You may notice the tube has some grey or white dust on it. This is powder used to help keep the tube dry and prevent sticking unnecessarily. Leave that dust on there and do not remove it.

 Fitting the Tire

Now it's time to get the tire and tube ready. Take the folded up tube out of the box. Put a SMALL amount of air into the tube with a bicycle pump. Note, the tube is VERY weak on its own. However, you need a little air to give the tube its round shape. All you need is the shape, you don't need it hard.

Once it has it's shape, slide the tube into the tire shell. Now begin to seat the tire onto the rim by starting with one wire bead. Work around and around until the bead is entirely inside the rim's profile. You may need plastic tire levers to finish the the bead.

Next, take the levers and begin working the second bead into the profile of the rim. As you go MAKE SURE YOU DO NOT PINCH THE TUBE between the rim's edge and the tire's bead. This will cause a flat tire, so make sure the tube is entirely contained with the tire and not pinched anywhere. Again, work slowly and around and around until it's seated.

Now slowly pump the tire up to about 10-15 lbs of pressure. At this point the tire should have its shape but be very soft. Begin to work around and around both beads, pulled and squeezing until the tire's beads are both properly seated. Again, watch for tube pinches between the bead of the tire and the rim. Make sure it's not pinched.

Next, the tire should be a uniform shape and seating. Gradually pump up the tire to about 30 pounds. At 30 pounds do a quick check around to make sure it's good still. If it's fine, pump to full riding pressure. In this case, I pump to about 55 pounds, which is a little hard, but will give the tire a good stretch overnight.

Put on the valve cap and let the tire rest overnight. Come back tomorrow and check the shape and pressure again to make sure it's all set. If you notice any problems, deflate back to 10-15 pounds and re-work the seating until correct, then follow the steps for pumping up outlined above. I recommend a hand operated bicycle pump and not an air compressor for this because it lets you work slowly.


Reflector Time

 The reflector for the back fender also came tonight. I did some research and found the Gulotta type "Multi Bead" was a common reflector on light weights in the 1940s. The Columbia catalog lists the early 40s Sports Tourists as having multi bead reflectors, and a couple examples of late 1940s New Worlds I saw had the same. These are not too hard to find on Ebay, so I bought one for the bike. I also received a second, which I will use on the Columbia ballooner. I really like the look of these, and they're not too expensive.

Mounting is not hard: put the stud through the hole in the fender, then tighten the lock washer and nut inside the fender. It looks nice.


Sunday, January 13, 2013

Truing A Bicycle Wheel: Schwinn New World

This weekend I got a chance to finish cleaning up the front wheel. I used the Dremel brush, bronze wool, and WD 40 method that I employed for the rear wheel back in December. That method can be seen in an earlier post.

After the cleaning, I  cleaned and lubricated the front hub. The hub is a Schwinn script type hub with basic ball bearing cages inside. I flushed it with WD40, then added some medium weight oil, then sealed up the bearings with lithium grease, again similar to the rear wheel back in December.

After the hub was cleaned and the rim de-rusted, I set about truing the wheel. There are several ways to true a bicycle wheel, but they're all similar. First, you can put the wheel in the bike frame or the fork, then watch for wobbles and correct them as needed. Second, you can put the wheel in a dedicated truing stand and, again watch for wobbles and hop. Third, you can use a spare bicycle fork as a makeshift truing stand.

Regardless of what you are using, the basics are the same: you tighten spokes where you want to move the rim in towards the hub or towards the side you're tightening. You loosen a spoke to allow the rim away from the hub or to "push" the rim toward the other side.

If you look at the bicycle wheel, you have basically 2 types of spokes for truing purposes, left spokes and right. Some spokes connect the rim to one side of the hub and some to the other. When you tighten a spoke, you pull the rim to that particular side.

1. Put the wheel into the fork or frame or stand, and make sure it is centered. Tighten it into the stand, fork or frame as needed.

2. Spin the wheel slowly and watch the rim between the blades of the fork or frame. If you see the wheel jump to one side or the other, the rim is out of true. Also, look from the side and see if the rim spins "roundly" or if it "hops up and down". This means the rim is out of round vertically. You need to correct both.

3. IMPORTANT: use a PROPERLY SIZED spoke wrench to turn the nipples connecting to the spokes to the rim. There are 2 little flats on the nipples so the wrench will fit tightly. DO NOT attempt to use pliers. If the rim wobbles to one side, find the spot where the movement in the rim is. Then LOOSEN the spoke connecting the rim to that side of the hub by 1/4 turn. Next, TIGHTEN the opposite spoke (connecting the rim to the opposite side of the hub) 1/4 turn. Test again, and repeat until the rim is centered.


4. If the rim is out of round, check to see if the rim hops up or down. If the rim hops AWAY from the hub, find the spot of the hop and tighten ALL spokes in the area of the hop 1/4 turn. This will pull the rim back towards the hub. If the rim hops TOWARD the hub too much, then LOOSEN the spokes in that area.

5. Keep checking both the round of the rim and the left and right wobble.


Tuesday, January 8, 2013

Freeing a Stuck Bicycle Seat Post

One of the most frustrating things is when an old seat post becomes stuck. The New World project had just such a seat post. The usual pulling and methods did not work, so I resorted to my old standby: heat and Kano Kroil.

First, I removed the external great seat post clamp and bolt, exposing the top of the seat tube. The seat tube has a cut in it which supposedly allows for the seat to be easily extracted once the over-clamp is loosened. That did not hold true this evening.

So I set to work with a Bernzomatic small butane torch and Kano Kroil. I realize that some people absolutely will not use the heat on their seat tube. It depends on the bike though. A particularly rare or valuable bicycle probably should not be subjected to heat. However, this bike is of only moderate value, and the portion of the seat tube I'm heating will be invisible anyway because it is concealed by the great over-clamp once reassembled.


1. Heat the mouth of the tube with the torch. It does not need to be red hot, but should still be quite hot (too hot to touch).
2. Apply Kano Kroil at the spot where the tube and the seat post touch
3. Wait for it to cool

Now you can begin to try to coax the post out. I like to use an old saddle and clamp it on the post nice and tight, then use the saddle as a handle to pull up the post. I first try to pull straight up, but if that doesn't work, I resort to turning the seat post while pulling. Again, this may scratch the post to some degree, so use caution if you have a rare or valuable bicycle. Since I ride my bikes, I need to free this seat post to properly set up the riding position. I prefer doing full turns to twisting back and forth.

Repeat the heat and Kroil as needed.


Sure enough, after quite awhile of pulling and oiling, the seat post came out without any cracks or bends. There are a few scratches, but nothing bad. Letting the Kroil do the work for you really makes a difference. The Kroil did not harm the Schwinn paint, but I also would not want to make a mess with it either.

REMEMBER: wipe off any excess oil that drips onto the finish, even if you think it's paint safe.


Appendix:


Machinist's Workshop Magazine discussed solvents used for freeing frozen parts. They found in freeing a frozen part:

       Product / Average load / Price for each fluid ounce


  • None / Required 516 pounds of force to free / (no cost)
  • WD-40 / 238 pounds / $0.25
  • PB Blaster / 214 pounds / $0.35
  • Liquid Wrench / 127 pounds / $0.21
  • Kano Kroil / 106 pounds / $0.75
  • Auto Transmission Fluid (ATF)-Acetone mix / 53 pounds / $0.10

NOTE: do NOT attempt to use the ATF-Acetone mix on anything with paint or near paint. The Acetone will compromise the paint it touches. Go with Kroil or Liquid Wrench instead.


Monday, January 7, 2013

Simulating Cad Plating Part 2

I got a nice little space heater for the shed as a Christmas gift, which has really come in handy. Tonight I made a little use of it, along with my newly repaired work lamp.

I had previously mentioned that I was simulating aged/faded Cad plating using a rub made of thinner Chrome paint and a rag. Tonight, I finished the rub by "aging" and adding texture to the color, to simulate old Cad plating.

As you may have seen in the previous entry, the silver paint went on thin, but still quite smooth and sort of obliterated the texture of the bare metal. This is one of the tell tale signs of spray paint. However, I had to wait for the paint to dry to "age" it.

The aging is not scientific at all, but is more a nebulous art. You basically take a soft cloth, or even a paper towel, and rub the part until you get the desired look. The more you rub, the more "worn" the piece will look. Remember to work with a careful hand and go slowly.

The results are not bad- the rubbing removes the brightest, while leaving the silver color in the low spots. In this way you polish, texture-ize, and age the part all at once. If you rub enough, eventually some spots dark as you get closer to bare metal. You can simulate a worn "relic" look if you know where to hit. If you want to do the "relic" thing, you can hit the high spots, and spots that stick out, as well as those that would rub in the course of normal use.


This is a preliminary result. I'm going to leave them until I put the fenders onto the bike, to see how they compare to the other parts. I think I may have to do one more brief pass on them, but I'll wait for the finishing touch to blend it in while on the bike. For now, I've regained a nice, aged texture without all the rust and tarnish. Also, the active rust is gone, so the part should be protected from further degradation for the most part.

Sunday, January 6, 2013

Multiple Schwinn Repairs: Cleaning, Polishing, Touching Up Bicycle Parts, Headset Rebuild

It was warm this weekend here, so I got quite a bit done on the New World project. Normally it's in the upper 30s this time of year, but both days this weekend were around 50. There's been plenty of winter up north, where I was on vacation. Now down here in Virginia, there's been no real winter... so far.

I. Polishing A Bicycle Frame

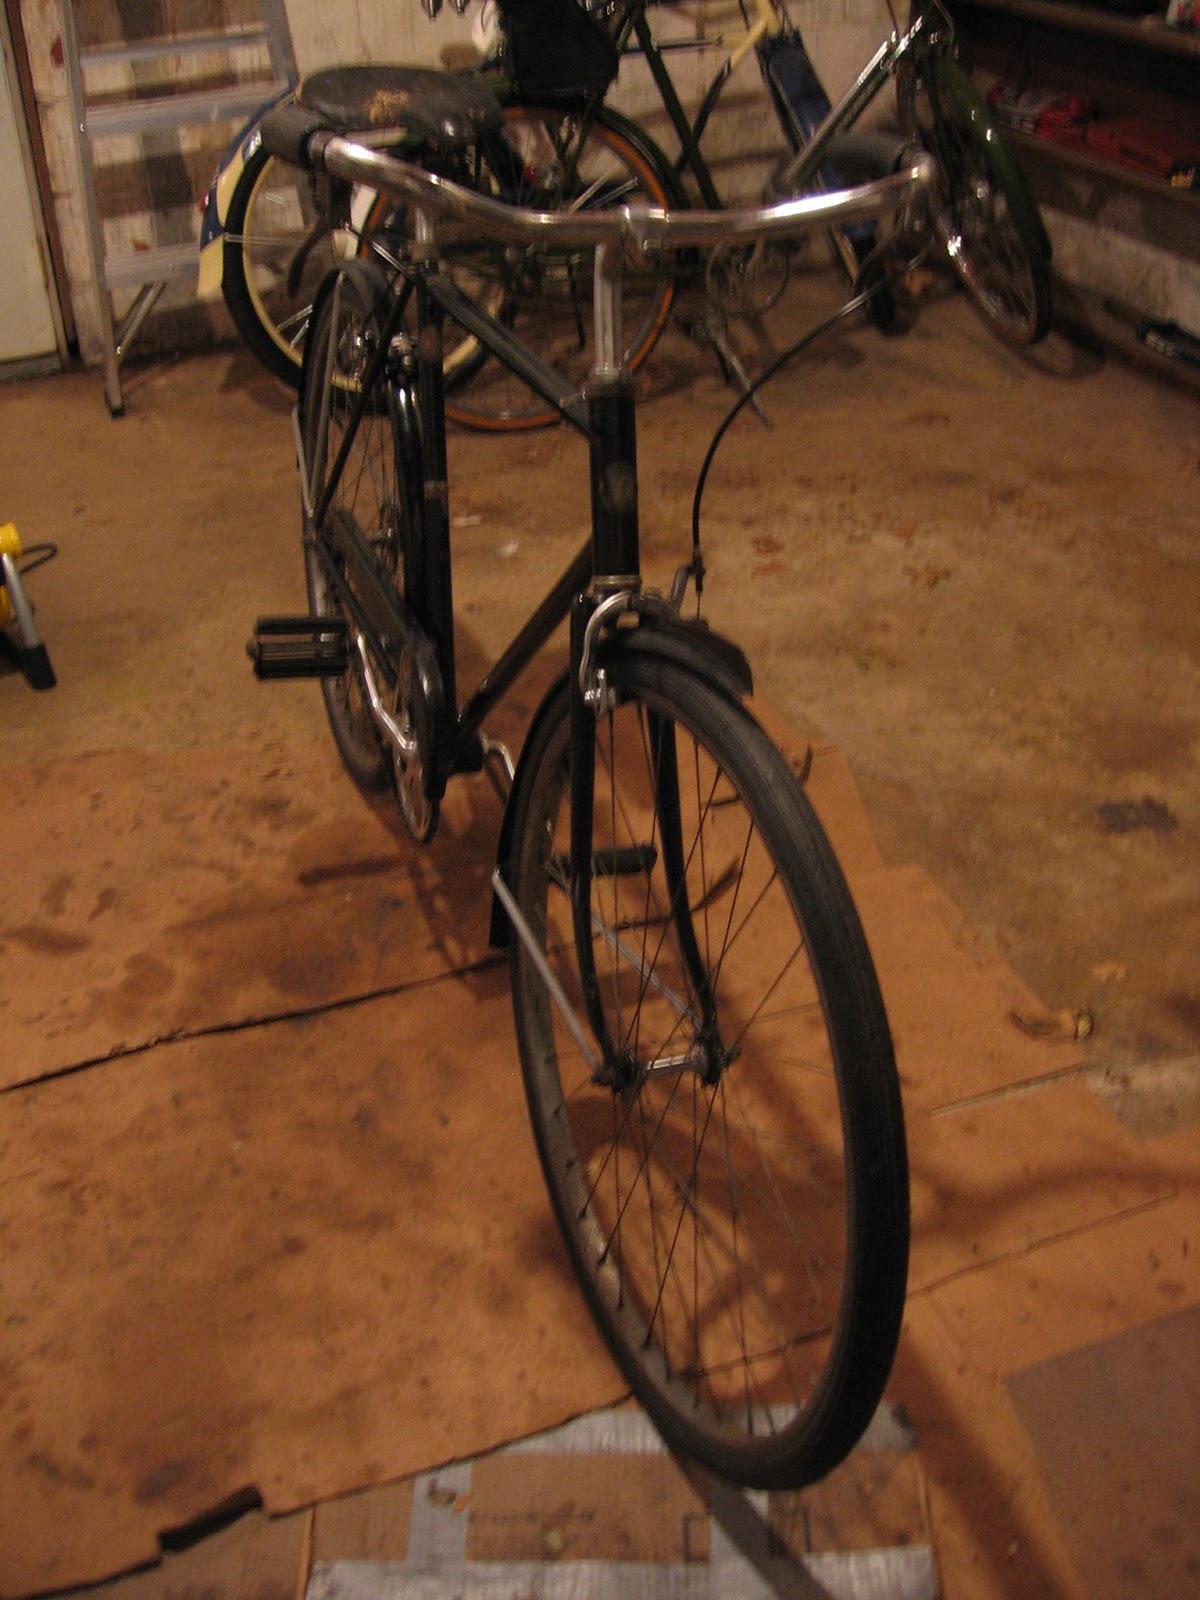
The first thing I did was to bring the bike and parts outside into the (relatively) warm sun. I used Scratch Doctor brand car polish to polish up the frame.  I basically follow the directions.

1. Rub on the polish to form a film and let it sit a couple minutes.
2. Take a clean, soft cloth and buff the frame until the desired shine is achieved.

This also was beneficial because it allowed me to see where I needed to clean up the paint further, or apply patches of matching touch-up. Polishing first also allowed me to see what the final finish would look like on the frame, so I could better match the paint if I needed to touch up anywhere.

II. Bottom bracket rebuild:

I also put the bottom bracket back together.

1. Apply grease to the bearings, cups and cones. I used a dark lithium grease, which is my grease of choice because it stays soft in cold conditions and stays loose without becoming sticky or heavy like traditional axle grease.
2. Re-assemble in the opposite manner that you disassembled it. If you recall from my earlier entry on bottom brackets, I used a string loop to help keep the pieces in order.


II. Bicycle Fender Touch-Up

A. Fender Wells and Preventing Fender Rust

Previously, I had soaked fenders in oxalic acid and used a Dremel wire brush to remove rust and clean up bare spots. Then, I used polish to clean up the fenders, using the method I did above on the frame.

I started with the insides of the fenders. The insides of the fenders are low visibility, but they are a hot spot for rust. In this case, I decided to coat the insides of the fenders with thinned mixture of enamel paint. The way I did this was to match the paint (Semi-gloss black matched), then thinned the paint with a little thinner. I used probably 4 parts paint to 1 part thinner. I then soaked a wedge sponge brush-type tool and coated the insides of the fenders.

The thinned paint seeks its own level, much like water, so filled in the low spots and bare spots in the fender well. This creates a barrier against moisture and future rusting. Remember, these wells often see moisture from puddles and just riding around, so you need a coating in those bare spots. Once dry, the product is presentable, but also a nice barrier against rust and further corrosion. In the picture below you can see the coating. The light spots you see are dust.


B. Fender Exterior

The fender exterior is obviously tougher. You need to both prevent rust and blend with the existing paint. There are a couple of options:

i. Remove the rust and rub with oil/WD40 every so often. This is the relic approach and is best for bikes where you don't want to put on any paint. Uncommon bikes in original condition probably fall here. I wouldn't put any paint on a rare or very valuable bicycle, but obviously you have to get active rust off and keep moisture out of bare metal spots.

ii. Remove the rust, then match the paint and fill in bare spots. This is what I did on the New World bicycle. The bike has some value, but it not particularly rare or highly valuable. Again, I used a thinned mix of paint. I took gloss black, thinned 1 part thinner to 3 or 4 parts paint (a little improvising there) and used a very small brush to dab the paint into the low spots. Once again, the thinner in the paint allowed it to drop in and level in the low parts because of it had better viscosity than thicker paint.

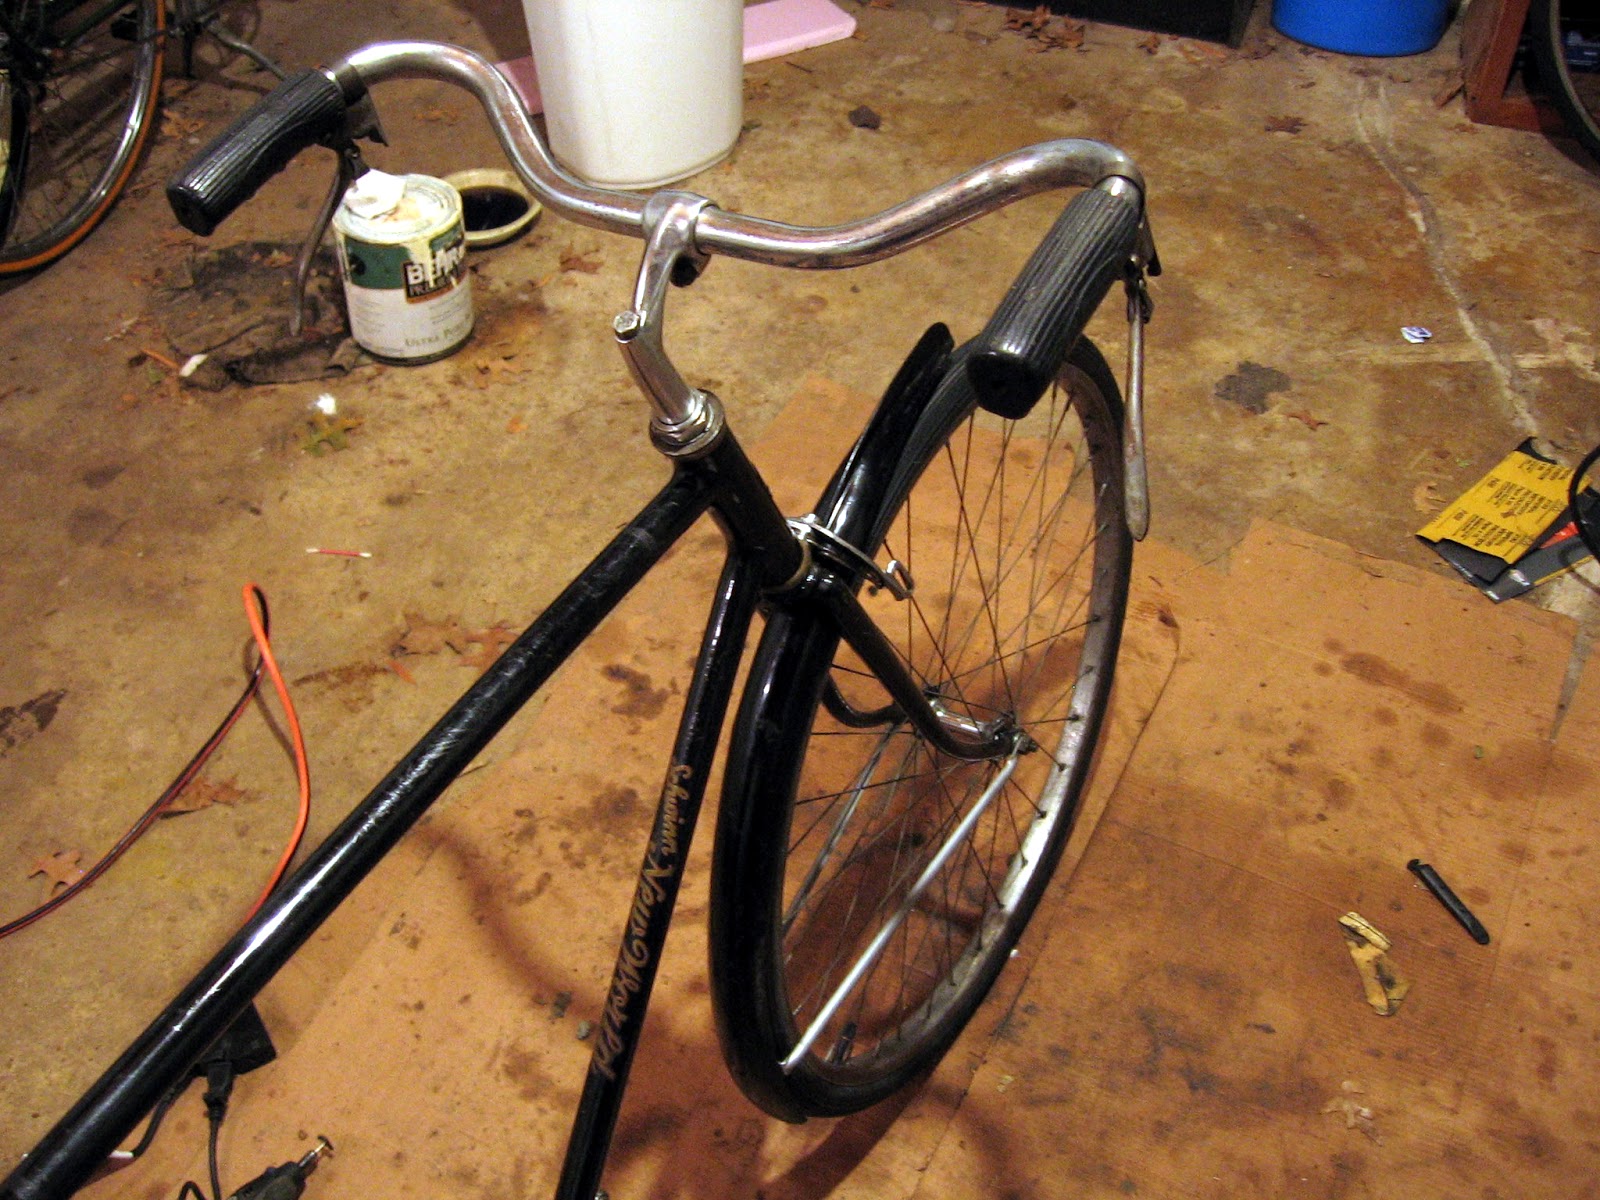
However, before I could do that I discovered the rivets holding the fork mounting bracket to the fender were damaged beyond tightening or repair. I drilled and punched them out, the replaced with riv-nuts. I then paint matched the riv-nuts to the rest of the finish. The results are below.


As you may recall, the fender braces were bare. They had no Cad plating left on them and were rusted. I used bronze wool and a Dremel wire brush to remove the rest of the rust. I then made up a "Cad-type wash". This basically is thinned chrome paint applied to a rag and rubbed in to match cad plating. In this case, I wanted to simulate aged cad plating, which is silver but somewhat flat compared to new cad or to chrome.

1. Dipped a soft rag in paint to partially soak with thinner.
2. Spray Chrome paint onto the rag until that same spot that had the thinner takes on the paint and it mixes with the thinner in the fiber.
3. Rub and improvise until it looks right 

The results are mixed. It is not as perfect as nice, aged Cad plating, but it beats letting the metal rust and it beats plain silver hobby paint. The silver finish is a little strong right now, but I'll come back after a week or so with a dry rag and "wear" the finish so that it looks like aged Cad. So far, it looks like the picture below, but once "aged" a little more, it will match nicely.


 III. Regreasing a Bicycle Headset

1. Disassemble the headset

Old bicycles have pretty simple headsets. You remove the upper nut and the fixed spacer, then unscrew the head set ring. This ring is attached to threads on the fork shaft, allowing the fork to be removed from the bike. Beware that inside those silver cups on the frame are two sets of ball bearings. Some bicycles have loose balls, and some have ball cages. This 1947 Schwinn New World has small cages.


 2. Cleaning

The fork will now drop out of the frame. Make sure not to damage the headset bearings. Now, take some de-greaser (I used 409) and a tooth brush. Brush off the old grease until clean. Also inspect the fork shaft for damage or corrosion. I used a Dremel wire brush to remove some rust from this fork shaft. Fortunately, the rust was superficial and there was no pitting. The fork shaft often will also allow you to see the original primer and paint colors of a bicycle. Most amateur re-paint spray jobs miss this spot. In this case, we have classic Schwinn red primer and black paint.

As you can see, there is a silver bearing race cone on the fork. This is a vital part of the steering, so check it for damage. You should really give it a good cleaning.


Also clean the balls/cages. These are small cages, as seen below. They are marked "Hartford" and are made in the USA. They are most likely original.


Also clean the upper cone and, again, check for damage. It is shown below.


3. Re-grease and assemble

As I mentioned above, I like dark lithium grease. It's thinner and doesn't gum up like traditional axle grease, but it not so thin it runs out all over. I really like to give a good coating. Apply the grease to the cups, cones, and bearings. Re-assemble in the reverse of how you disassembled. Again, be careful not to pinch the bearings or cross-thread the upper cone. Those threads are REALLY fine, so be careful. Some people also apply a little graphite anti-seizure compound (Choke Tube Lube, for example; NOT Loc-Tite) to the fine threads. 


 Well that was quite a bit of work. Much was done and the project is well on the way.